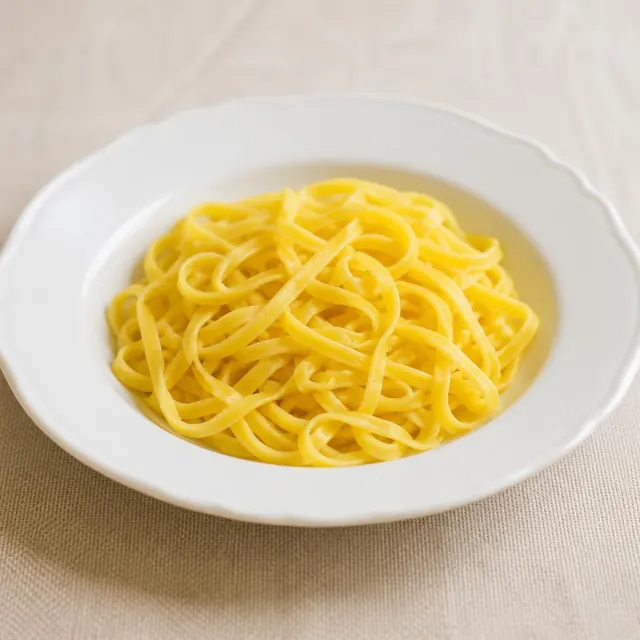
Menu · 2 components
Italian pasta with a sauce of your choice
One serving of pasta with tomato and basil sauce is the default; gnocchi, gluten-free pasta and five more Italian sauces are further choices.
Menu portion46 min354.5 kcal per menu portion
- Good for lunch
- Good for dinner
1Main course
Cooked pasta (shop-bought) traditional
278 kcal per menu portion · 1 × recipe portion per menu portion
- Vegan
- Lactose free
Contains: Gluten · May contain: Egg
Quantities for the whole recipe (4 servings).
Shown: ready-made product Cooked pasta (shop-bought).
or:
- Potato gnocchi (gnocchi di patate) · 516 kcal per menu portion
- Cooked gluten-free pasta · 268 kcal per menu portion
Ingredients
- 300 gPasta, dry, enriched
- 2 gSalt, table editorial addition
Method
- Bring a large pot of water to a boil and add 20 g salt.
- Add pasta and cook according to the packet until al dente.
TipCooking pastaPasta water isn't waste, it's liquid glue that talks the sauce into clinging to the pasta.Why and howShow less
Why
In the first minutes of boiling, starch is released from the surface of the pasta and it turns sticky; plenty of rapidly boiling water and a stir at that point stop it clumping, and the water doesn't cool down as much when the pasta goes in. Salt only gets into pasta while it cooks, which is why the water is salted generously, roughly 10 g per litre; that amount has a negligible effect on the boiling point, and oil in the water is pointless because it floats on top and doesn't prevent sticking. The cooking water is full of dissolved starch that thickens the sauce and helps its fat combine with water into a smooth emulsion that clings to the pasta. That is why pasta isn't rinsed after draining – you would wash off the starch the sauce holds on to and cool the pasta down; the only exception is pasta for a cold salad.
How to do it
- Allow roughly a litre of water per 100 g of pasta and add about 10 g of salt per litre once it boils.
- Drop the pasta into rapidly boiling water and stir now and then for the first two minutes.
- Don't add oil to the water; it won't stop sticking.
- Cook a minute or two less than the packet says and keep tasting.
- Before draining, scoop out a mugful of the cooking water.
- Don't rinse the pasta; transfer it straight into the sauce and finish cooking it there with a little of the cooking water.
If it goes wrong
Loosen pasta that has stuck together in the sauce with a little hot cooking water, or dip it briefly in boiling water and stir. Overcooked pasta won't firm up again – bake it or add it to a soup, and next time start tasting earlier. Under-salted pasta can only be rescued by a well-seasoned sauce.
- Drain pasta; do not use the drained water as sauce.
Alternative: Potato gnocchi (gnocchi di patate)
Ingredients
- 1,000 gPotatoes, russet, flesh and skin, raw (Includes foods for USDA's Food Distribution Program)
- 350 gWheat flour, white, all-purpose, unenriched
- 50 mlBeverages, water, tap, drinking
- 4 lBeverages, water, tap, drinking not counted – removed
- 4 gSalt, table editorial addition
Method
- Boil the potatoes in their skins in unsalted water (or steam them) for 30–40 minutes until a knife slides in without resistance. Drain and let them steam dry for a minute.
- Peel the potatoes while still hot (hold them with a fork or cloth) and press them through a ricer onto a floured board. Spread them out and let the steam escape for 2–3 minutes.
- Sprinkle most of the flour over the potatoes and work it in briefly by hand just until you have a smooth, soft, slightly sticky dough; do not knead for long, or the dough will toughen and the gnocchi turn hard. Keep the rest of the flour for dusting.
TipPotato dough: dumplings, noky, gnocchiPotato dough wants dry, cooled potatoes, just enough flour to hold, and quick hands: kneading and standing make it slack and sticky.Why and howShow less
Why
A cooked potato is a cluster of cells full of swollen starch (see the Mashed potatoes card); when long kneading or blending ruptures the cells, the released starch forms a sticky mass with the water from the potatoes, more flour then gets added, and the dumpling turns out tough and gummy. Floury potatoes of cooking type C, or B, have more starch and less water and give a supple dough with less flour, whereas watery waxy potatoes of type A thin the dough; that is why the potatoes are boiled in their skins or baked and left to steam off and cool before use. Finished dough softens and gets sticky as it stands, and the more flour then goes in, the tougher the dumpling, so it is worked quickly and cooked at once. In the water it keeps its shape when the water only simmers and the surface sets quickly, whereas a hard boil and long cooking wear the surface away and the dumpling or gnocchi falls apart. Green patches, eyes and sprouts of potatoes contain bitter, toxic glycoalkaloids (solanine), so the German BfR advises removing them generously.
How to do it
- Choose floury potatoes of type C, or B; boil them in their skins or bake them, peel and let them steam off and cool, even a day ahead in the fridge.
- Cut out green patches and eyes generously; do not use green, shrivelled or heavily sprouted potatoes, or potatoes that taste bitter.
- Grate the potatoes finely or put them through a ricer, do not blend them; add egg, salt and flour and bring the dough together quickly, just until smooth and holding its shape.
- Add the flour gradually: first cook one small test dumpling or gnocchi and add more flour only if it falls apart.
- Cook shaped dumplings and gnocchi at once, in small batches, in salted, gently simmering water; lift gnocchi out shortly after they float.
- Take a cooked dumpling out at once, pierce it and slice it with thread or a sharp knife; move gnocchi straight into the sauce or melted butter so they do not stick together.
If it goes wrong
Firm up sticky dough with only a small amount of flour or semolina and shape it at once, as more kneading makes it worse. If the test dumpling falls apart, add a little flour or egg; if a whole dumpling falls apart in the water, cook the rest of the dough as small gnocchi or fry it as pancakes. Tough, gummy dumplings will not soften again: slice and fry them in butter, perhaps with eggs or cabbage, and next time use less flour and knead less.
- Divide the dough, roll each piece into a rope about 2 cm thick and cut it into 2–3 cm pieces. Roll each piece with your thumb over the back of a fork or the coarse side of a grater so it gets ridges and a dimple.
- Bring 4 litres of water with 40 g of salt to the boil and cook the gnocchi in batches. As soon as they rise to the surface (after about 1–2 minutes), lift them out with a slotted spoon and toss them with the sauce at once.
Alternative: Cooked gluten-free pasta
Ingredients
- 300 gPasta, gluten-free, corn, dry
- 2 gSalt, table editorial addition
Method
- Bring a large pot of water to a boil and add 20 g salt.
- Cook gluten-free pasta as directed until firm to the bite.
TipCooking pastaPasta water isn't waste, it's liquid glue that talks the sauce into clinging to the pasta.Why and howShow less
Why
In the first minutes of boiling, starch is released from the surface of the pasta and it turns sticky; plenty of rapidly boiling water and a stir at that point stop it clumping, and the water doesn't cool down as much when the pasta goes in. Salt only gets into pasta while it cooks, which is why the water is salted generously, roughly 10 g per litre; that amount has a negligible effect on the boiling point, and oil in the water is pointless because it floats on top and doesn't prevent sticking. The cooking water is full of dissolved starch that thickens the sauce and helps its fat combine with water into a smooth emulsion that clings to the pasta. That is why pasta isn't rinsed after draining – you would wash off the starch the sauce holds on to and cool the pasta down; the only exception is pasta for a cold salad.
How to do it
- Allow roughly a litre of water per 100 g of pasta and add about 10 g of salt per litre once it boils.
- Drop the pasta into rapidly boiling water and stir now and then for the first two minutes.
- Don't add oil to the water; it won't stop sticking.
- Cook a minute or two less than the packet says and keep tasting.
- Before draining, scoop out a mugful of the cooking water.
- Don't rinse the pasta; transfer it straight into the sauce and finish cooking it there with a little of the cooking water.
If it goes wrong
Loosen pasta that has stuck together in the sauce with a little hot cooking water, or dip it briefly in boiling water and stir. Overcooked pasta won't firm up again – bake it or add it to a soup, and next time start tasting earlier. Under-salted pasta can only be rescued by a well-seasoned sauce.
TipGluten-free flours and doughsWithout gluten, only a binder and water hold dough together, and it is safe for a coeliac only if not a crumb of wheat flour gets in.Why and howShow less
Why
In wheat dough the gluten network holds both gas and shape (see the Kneading and gluten card); rice, maize, buckwheat or millet flour and starches form no gluten, so without a substitute the dough does not rise, bread crumbles and a dumpling falls apart in the water. Binders imitate the network: psyllium (husk fibre from Plantago seeds), xanthan gum or egg form a thick gel with water; psyllium binds far more water than xanthan, so gluten-free dough needs more liquid, tends to be soft or even sticky, and its flours need time to absorb the water, otherwise the bread is gritty. Gluten-free bread is mostly starch, which firms up again after baking, so by the next day it is hard and it tastes best fresh or toasted. In coeliac disease even traces of gluten do harm: under EU Regulation 828/2014 a food labelled “gluten-free” may contain at most 20 mg of gluten per kg and any oats in it must be grown and processed separately, and a crumb from a chopping board, a shared toaster or oil used for breaded food can carry a similarly small amount into a dish.
How to do it
- Do not replace wheat flour 1:1 with a single gluten-free flour; use a blend of flour and starch with a binder, or a recipe written for gluten-free dough.
- Stir psyllium into the water first and let it gel; work the dough until soft or even sticky and shape it with wet hands, as stiff dough cracks and crumbles after baking.
- Let the dough rest for a while before baking or boiling so the flours absorb the water; long kneading does not help, as no gluten forms in it.
- Cook gluten-free pasta in plenty of water, start tasting earlier than the packet says and serve it at once; it sheds more starch, softens quickly when overcooked and sticks together as it stands.
- For a coeliac, cook the gluten-free dish first, in clean pans and water; keep a separate toaster or toaster bags, uncontaminated butter and spreads, and clean frying oil.
- Buy flours, flakes, starches and mixes labelled “gluten-free”; wheat, rye, barley and spelt contain gluten, ordinary oats are often contaminated, and a few coeliacs react even to gluten-free oats.
If it goes wrong
Bind crumbly dough with a spoonful of psyllium stirred into water or with an egg; thicken dough that is too runny with a little flour blend and let it rest again. If a dumpling falls apart in the water, steam it next time. Refresh bread that has gone hard by toasting it or warming it briefly in the oven, and next time freeze it sliced. A dish that wheat flour or breadcrumbs got into is no longer gluten-free for a coeliac, and removing the crumbs does not fix that.
- Drain in a clean colander and serve immediately.
2Sauce
Tomato sauce with basil traditional
76 kcal per menu portion · 1 × recipe portion per menu portion
- Vegan
- Lactose free
- Gluten free
Contains none of the 14 main allergens.
Quantities for the whole recipe (4 servings).
or:
- Bolognese ragù (ragù alla bolognese) · 327 kcal per menu portion
- Amatriciana sauce (sugo all’amatriciana) · 275 kcal per menu portion
- Genoese pesto (pesto alla genovese) · 196 kcal per menu portion
- Arrabbiata sauce · 110 kcal per menu portion
- Spinach ricotta sauce · 201 kcal per menu portion
Ingredients
- 400 gTomatoes, red, ripe, canned, packed in tomato juice
- 100 gOnions, raw
- 10 gGarlic, raw
- 1.5 15 ml tablespoonOil, olive, salad or cooking
- 20 gBasil, fresh
- 3 gSalt, table
Method
- Finely dice the onion, slice the garlic and tear the basil.
- Heat 1½ tbsp oil in a wide saucepan, soften onion for five minutes and add garlic for the final minute.
- Add tomatoes and salt, then simmer uncovered for 20 minutes until thick. Stir in basil and serve as a sauce with a separately prepared side.
TipReducing a sauceReduction boils off the water but keeps the salt: a sauce that was just right can easily end up as brine.Why and howShow less
Why
When you reduce a sauce, simmering it uncovered, water evaporates while flavour compounds, sugars, gelatin from meat and bones and salt stay in the pan, so they become concentrated and the sauce thickens. If you salt it at the start and then reduce it by half, it will be roughly twice as salty – which is why seasoning is adjusted at the end. The brown bits stuck to the bottom of the pan or roasting tin after searing or roasting (the fond) are among the tastiest parts of a sauce: poured over with stock, wine or water and scraped up, they dissolve into the sauce – this is called deglazing. A gentle simmer is enough; at a hard boil the sauce easily scorches at the edges and on the bottom, and if it contains a lot of sugar or gelatin it reduces into a sticky mass.
How to do it
- Cook uncovered in a wider pan so the water evaporates faster.
- Salt only at the end, once the sauce has the thickness you want.
- Pour hot stock, wine or water over the fond and scrape it off the bottom with a wooden spoon; leave out black, burnt bits, they would make the sauce bitter.
- Keep only a gentle simmer and stir now and then, especially at the bottom and the edges.
- Test the thickness on a spoon: the sauce should coat it thinly; bear in mind it will thicken further as it cools.
If it goes wrong
An oversalted sauce can only be saved by diluting it: add unsalted stock, water or cream and bring the thickness back with a short simmer. Thin a sauce that is too thick or sticky with a little hot water. Pour a scorched sauce into a clean pan at once without scraping the bottom; if it already tastes burnt, it can't be saved.
Alternative: Bolognese ragù (ragù alla bolognese)
Ingredients
- 400 gBeef, ground, 85% lean meat / 15% fat, raw (Includes foods for USDA's Food Distribution Program)
- 150 gPork, cured, bacon, unprepared
- 60 gOnions, raw
- 60 gCarrots, raw
- 60 gCelery, raw
- 2 15 ml tablespoonOil, olive, salad or cooking
- 100 mlAlcoholic beverage, wine, table, red
- 20 gTomato products, canned, paste, without salt added (Includes foods for USDA's Food Distribution Program)
- 200 gTomato products, canned, puree, without salt added
- 100 mlMilk, whole, 3.25% milkfat, with added vitamin D
- 300 mlSoup, stock, beef, home-prepared
- 3 gSalt, table
- 0.6 gSpices, pepper, black
Method
- Chop the pancetta finely with a knife. Chop the onion, carrot and celery as finely as possible with a knife (not in a food processor, which would make the vegetables watery and mushy).
- In a heavy-based pot (ideally cast iron or earthenware) heat the oil with the pancetta and let it melt over low heat for about 5 minutes. Add the vegetables and soften them slowly for 8–10 minutes, stirring now and then; they must not brown.
- Add the minced beef, raise the heat and cook, stirring constantly, for about 10 minutes until the released juices have evaporated and the meat sizzles and browns lightly.
- Pour in the wine and let it evaporate completely, stirring, for about 5 minutes.
TipReducing a sauceReduction boils off the water but keeps the salt: a sauce that was just right can easily end up as brine.Why and howShow less
Why
When you reduce a sauce, simmering it uncovered, water evaporates while flavour compounds, sugars, gelatin from meat and bones and salt stay in the pan, so they become concentrated and the sauce thickens. If you salt it at the start and then reduce it by half, it will be roughly twice as salty – which is why seasoning is adjusted at the end. The brown bits stuck to the bottom of the pan or roasting tin after searing or roasting (the fond) are among the tastiest parts of a sauce: poured over with stock, wine or water and scraped up, they dissolve into the sauce – this is called deglazing. A gentle simmer is enough; at a hard boil the sauce easily scorches at the edges and on the bottom, and if it contains a lot of sugar or gelatin it reduces into a sticky mass.
How to do it
- Cook uncovered in a wider pan so the water evaporates faster.
- Salt only at the end, once the sauce has the thickness you want.
- Pour hot stock, wine or water over the fond and scrape it off the bottom with a wooden spoon; leave out black, burnt bits, they would make the sauce bitter.
- Keep only a gentle simmer and stir now and then, especially at the bottom and the edges.
- Test the thickness on a spoon: the sauce should coat it thinly; bear in mind it will thicken further as it cools.
If it goes wrong
An oversalted sauce can only be saved by diluting it: add unsalted stock, water or cream and bring the thickness back with a short simmer. Thin a sauce that is too thick or sticky with a little hot water. Pour a scorched sauce into a clean pan at once without scraping the bottom; if it already tastes burnt, it can't be saved.
- Stir in the tomato paste and the passata, cover with a lid and let the ragù barely bubble over very low heat for 2 hours (up to 3 hours if you like). Whenever it starts to dry out, add a ladleful of stock. After about an hour, stir in the milk and let it be absorbed and evaporate during the rest of the cooking. Finally season with salt and pepper. The finished ragù is thick and dark reddish brown, with fat on the surface.
TipTomatoes, tomato paste and acidityTomatoes have character: raw paste is sharp and sour, but a few minutes in fat give it a rounded flavour.Why and howShow less
Why
Tomato paste is concentrated tomato flesh with plenty of sugars and acids; briefly fried in fat, some of the sugars brown and the raw, sharply sour taste turns full and rounded, but it must be stirred, because it scorches easily on a dry pan base. Long simmering, fat, cream or a little sugar soften a sharp sauce; sugar doesn't neutralise the acid, though, it only balances it on the palate. Baking soda really does neutralise acid, but in tests it made the sauce taste flat, and larger amounts foam and taste soapy, so a pinch at most. Acid firms up the cell walls of vegetables and pulses, so beans, chickpeas and potatoes soften more slowly in tomato sauce. Acidic food doesn't belong in uncoated aluminium: the German BfR advises against cooking or storing acidic and salty food, such as tomato purée, in uncoated aluminium pots, because aluminium migrates into it; with cast iron, manufacturers say long cooking of acidic food strips the protective seasoning.
How to do it
- Stir the paste into hot fat and fry it for a few minutes, stirring constantly, until it darkens and smells sweet; then add liquid at once.
- Simmer a sour sauce for longer and round it off with fat or cream; add sugar little by little and taste.
- Use baking soda only as an exception, a pinch per pot at most, and let it fizz out before tasting.
- Cook beans, chickpeas and potatoes until tender first, or allow longer cooking in the sauce – see the Cooking pulses card.
- Cook and store tomato sauces in stainless steel, enamel or glass, not in uncoated aluminium or new, lightly seasoned cast iron.
If it goes wrong
Paste that has scorched on the base won't lose that taste: pour the sauce into a clean pot without scraping and start again with a fresh batch. An overly sour sauce is saved by longer simmering, a knob of butter or a spoonful of cream. Dilute a sauce that tastes soapy after soda with canned tomatoes and leave the soda out next time.
Alternative: Amatriciana sauce (sugo all’amatriciana)
Ingredients
- 125 gPork, fresh, variety meats and by-products, jowl, raw
- 2 5 ml teaspoonOil, olive, salad or cooking
- 50 mlAlcoholic beverage, wine, table, white
- 400 gTomatoes, red, ripe, canned, packed in tomato juice, no salt added
- 1 gPeppers, hot chile, sun-dried
- 2.5 gSalt, table
- 100 gCheese, romano
Method
- Cut the rind off the guanciale and cut the meat into strips about 1 cm wide and 0.5 cm thick. Crush the canned tomatoes by hand or with a fork (scald, peel, deseed and chop fresh San Marzano tomatoes). Grate the pecorino.
- Heat the oil in a frying pan (ideally iron) and fry the guanciale over low heat for 6–8 minutes until the fat turns translucent and the strips start to turn golden.
TipRendering bacon and lardBacon needs patience: on gentle heat its fat runs out and it crisps, on fierce heat it burns outside and stays rubbery within.Why and howShow less
Why
The fat in bacon and in pork back fat is held in the cells of fatty tissue bound together by connective tissue; heat liquefies the fat so it gradually runs out, the water evaporates, and the lean parts shrink and turn crisp. This takes time, which is why bacon goes into a cold pan, even with a little water, and is heated over medium heat: the water keeps the temperature low at first, the fat renders before the surface scorches, and the bacon crisps evenly. In a fiercely hot pan the surface burns, the fat blackens and smokes, and the fatty parts stay rubbery. Pork fat for cracklings is rendered over gentle heat with frequent stirring until the cracklings are light brown and crush easily; overcooked cracklings give dark lard with a burnt taste. Bacon cured with nitrite also forms nitrosamines when fried over fierce heat, and EFSA regards dietary exposure to nitrosamines as a health concern, so this is one more reason to fry bacon until crisp, not black.
How to do it
- Cut the bacon into slices, strips or cubes of even thickness, spread it in a cold pan in a single layer and, if you like, add about 4 tablespoons of water.
- Heat over medium heat and turn it now and then; the water evaporates and the bacon then keeps frying in its own fat.
- Take the bacon out as soon as it is golden brown; it crisps further on paper towel, and if it is dark while still in the pan, it is overcooked.
- Cut pork fat for cracklings into even cubes and render it in a heavy pot over gentle heat, stirring often, until the cracklings turn golden.
- Carefully strain the hot lard through a sieve into dry jars and keep it covered in the fridge once cool; never add water to hot fat, it boils up violently and spatters.
- Use the fat rendered from bacon to soften onions or vegetables; let the rest set and put it in the bin, not down the drain.
If it goes wrong
Put rubbery bacon back in the pan and let it keep rendering slowly over gentle heat until it crisps. Burnt bacon cannot be saved, it is bitter; take fat that has blackened or smoked heavily off the heat, let it cool a little, pour it carefully into a dry container and carry on in a clean pan. If the cracklings catch on the bottom before they release their fat, lower the heat and stir more often. Lard that has darkened and smells scorched is edible, but use it only where a stronger flavour does no harm.
- Pour in the wine and let it evaporate for 2–3 minutes. Lift out the golden strips with a slotted spoon and keep them warm; leave the fat in the pan.
- Add the tomatoes, salt and the piece of chilli to the same pan and cook over medium heat for about 15 minutes (10–20 minutes depending on how juicy the tomatoes are) until the sauce is thick and creamy and the fat separates at the edges.
- Return the guanciale to the sauce, stir and heat through for 5 minutes; adjust the salt.
- To serve, toss the sauce with pasta cooked al dente, add most of the pecorino off the heat and toss again; sprinkle the rest on top. One serving of sauce goes with one serving of pasta (about 80–100 g dried).
Alternative: Genoese pesto (pesto alla genovese)
Ingredients
- 50 gBasil, fresh
- 100 mlOil, olive, salad or cooking
- 45 gCheese, parmesan, grated
- 15 gCheese, romano
- 8 gGarlic, raw
- 15 gNuts, pine nuts, dried
- 2 gSalt, table
Method
- Rinse the basil leaves quickly in cold water and dry them thoroughly on a cloth without crushing them. Grate the cheeses.
- In a marble mortar, crush the garlic with a few grains of coarse salt to a paste with a wooden pestle, then add the pine nuts and crush them too.
- Add the basil a handful at a time with the remaining grains of salt and grind it with a circular motion of the pestle against the sides of the mortar, rather than pounding, until bright green liquid runs from the leaves. Work quickly and at room temperature so the basil does not oxidise.
- Work in the Parmigiano and pecorino and finally beat in the oil drop by drop with the pestle until a smooth sauce forms. Without a mortar, you can make pesto in a blender with a chilled jar, using short pulses at low speed so it does not warm up.
- Do not heat the pesto; to serve, loosen it only with 1–2 tablespoons of pasta cooking water and toss it with the pasta off the heat. Traditionally trofie or trenette are cooked together with diced potatoes and green beans in the same water. One serving of pesto goes with one serving of pasta (about 80–100 g dried).
Alternative: Arrabbiata sauce
Ingredients
- 800 gTomatoes, red, ripe, canned, packed in tomato juice
- 15 gGarlic, raw
- 15 gPeppers, hot chili, red, raw
- 35 mlOil, olive, salad or cooking
- 2 gSalt, table
Method
- Prepare 800 g tomatoes in tomato juice, 15 g garlic, 15 g red chilli peppers, 35 ml olive oil and 2 g salt. Slice garlic thinly, remove chilli stems and chop finely.
TipChilli and heatCapsaicin doesn't get along with water but does with fat and milk, so a glass of water barely helps a burning mouth.Why and howShow less
Why
The heat of chillies comes from capsaicin and related compounds, which stimulate the receptors for pain and heat; most of it sits in the white membranes inside the pod that hold the seeds, while the seeds themselves make none and are only coated with it. Capsaicin barely dissolves in water but dissolves well in fat and alcohol, so chilli fried in oil spreads its heat through the whole dish and water does not soothe a burning mouth – cold milk or yoghurt works better. In a dry, very hot pan or in very hot fat, capsaicin is released into the air and stings the eyes and throat, and dried chilli also scorches easily and turns bitter. Dried chilli has lost its water, so the same weight is usually hotter than fresh, and its flavour is more roasted and less fresh.
How to do it
- Wear gloves when cutting hot chillies and keep your hands away from your eyes; take contact lenses out beforehand.
- For milder heat, cut out the white membranes together with the seeds; scraping out only the seeds lowers the heat very little.
- Fry chillies and chilli flakes in fat only briefly over gentle heat and ventilate the kitchen; once they darken, they turn bitter.
- Add chilli a little at a time and taste, as the fat in a sauce carries the heat through the whole pot.
- Wipe the burn off your skin first with a little oil and a paper towel, then wash your hands thoroughly with soap and water.
If it goes wrong
Tone down an over-hot dish by diluting it: add another batch of the unspiced base, cream, yoghurt or coconut milk, and serve it with rice or bread. Cold milk or yoghurt soothes a burning mouth; water barely helps. If chilli gets into an eye, take out any contact lens, don't rub the eye and rinse it with lukewarm running water for at least 15 minutes; if pain, redness or blurred vision persist afterwards, see a doctor.
- Heat 35 ml oil in a wide saucepan. Stir garlic and chilli in it over low heat for 90 seconds; they must not brown.
TipBlooming spices in fat (tadka)Cumin in hot ghee fills the kitchen with its scent in half a minute – leave it a little longer and it turns black and bitter.Why and howShow less
Why
Many of the aroma compounds in spices, the so-called essential oils, dissolve far better in fat than in water; when spices are fried briefly in hot oil or ghee, their aroma is released into the fat, which then carries it through the whole dish. Whole seeds such as cumin, mustard or coriander can take several tens of seconds in hot fat, while ground spices, with their much larger surface, scorch far sooner, often within half a minute; garlic and ginger go in after the seeds and are fried only until golden. A tadka (also chaunk or baghaar) is made either at the start of cooking, with onion or tomatoes following straight after the spices, or at the very end, when the hot spiced fat is poured into the finished dish, dal for example. Well-bloomed spices smell nutty and warm, underdone ones taste raw and dusty, burnt ones bitter.
How to do it
- Measure out all the spices beforehand; a tadka takes only moments and won't wait while you hunt for a jar.
- Heat the fat to about 160–170 °C; a test seed should sizzle straight away.
- Add the whole seeds first and fry them for about 30 seconds, until fragrant and a shade darker; mustard seeds until they pop.
- Add ground spices last, or together with something moist such as onion or tomatoes that cools the fat down.
- Fry garlic and ginger only until golden; browned garlic turns bitter.
- Pour the finished tadka, fat and all, into the dish at once; in the hot pan it would keep darkening.
If it goes wrong
Burnt spices can't be saved: the bitterness would spread through the whole dish. Pour away the fat and spices, wipe the pan and start again – spices cost little, the whole dish much more. If the spices taste raw, fry them a moment longer or in hotter fat next time.
- Add tomatoes and 2 g salt. Simmer uncovered for 22 minutes, stirring occasionally, until thick; serve only with separately prepared pasta.
Alternative: Spinach ricotta sauce
Ingredients
- 450 gSpinach, raw
- 250 gCheese, ricotta, whole milk
- 10 gGarlic, raw
- 1.5 15 ml tablespoonOil, olive, salad or cooking
- 200 mlMilk, whole, 3.25% milkfat, with added vitamin D
- 3 gSalt, table
- 1 gSpices, pepper, black
Method
- Finely chop the garlic. Wash spinach and drain it in a sieve; roughly tear large leaves.
- Heat 1½ tbsp oil in a saucepan, fragrance the garlic for 30 seconds, add spinach and stir until wilted over four minutes.
- Add ricotta and milk, blend until smooth, heat for two minutes and season with salt and pepper. Serve with a separately prepared side.
TipBlending hot soups and saucesHot soup in a closed blender can blow the lid off – and the steam and soup then fly straight at the cook.Why and howShow less
Why
When the blades start, hot liquid in a blender jar is churned violently and releases a lot of steam; if it has nowhere to go, pressure builds up in the jar, which can lift the lid and spray soup over hands and face. Manufacturers' instructions differ, though: some advise filling the jar no more than half full, preferably a third, removing the centre cap and covering the opening with a towel, others want the vented cap left in place, and some don't allow hot liquids at all or only up to a set temperature; they agree on starting at the lowest speed. Sealed smoothie cups without a vent should not be used for hot ingredients at all. An immersion blender largely avoids this risk, because the soup doesn't have to be transferred and the pot stays open; even so, take the pot off the heat. With potatoes, watch the texture too: long or fast blending releases starch from the cells and the soup turns gluey, as the Mashed potatoes card explains in more detail.
How to do it
- Let the soup stand for a few minutes after cooking and don't blend it boiling; if the blender manual gives a maximum filling temperature, keep to it.
- Fill a blender jar no more than half full, preferably a third; blend larger amounts in batches.
- Fit the lid as the manual says: remove the centre cap and cover the opening with a towel only where the manufacturer advises it; otherwise keep the vented cap in place. Always hold the lid down.
- Start on the lowest speed and only increase it gradually.
- Where possible, use an immersion blender in a pot taken off the heat; submerge the blade before switching on and lift it out only after switching off.
- Blend soups with potatoes briefly, just until smooth, or mash the potatoes instead.
If it goes wrong
If the soup starts to rise in the blender or the lid lifts, switch it off at once and don't pull the lid off abruptly; let the contents settle for a moment and open the lid away from you. Cool a scald under cool running water for 20 minutes, don't put cream or butter on it, and get help for a large, deep or facial burn. Gluey potato soup can't be made smooth again; thin it with stock and blend for less time next time.
TipSalting and seasoningSalt does more than make food salty: it mutes bitterness and lets other flavours speak – but nobody can fish it back out of the pot.Why and howShow less
Why
Salt suppresses bitterness much more than sweetness, so it not only seasons a dish but rounds it out, and bitter vegetables taste milder once salted. When to salt depends on the method: pasta water right away (see the Cooking pasta card), meat either well ahead or just before searing (see the Salting meat ahead card), and anything that will be reduced for a long time only at the end, because the evaporating water leaves the salt in the pot (see the Reducing a sauce card). Acidity from lemon, vinegar or wine is the second lever of seasoning: a dish that tastes flat although it has enough salt is often missing exactly that, and acid also balances strong sweetness or richness. A raw potato will not rescue an over-salted dish: it soaks up a little salty liquid, but what is left in the pot is just as salty, so only diluting with an unsalted base helps.
How to do it
- Salt gradually and taste; salt added at the start of a long simmer becomes concentrated as the liquid reduces.
- Adjust the salt in soups, sauces and braises only at the end, once they have the consistency you want.
- When a dish tastes flat although it is salty enough, add a drop of lemon juice or vinegar first, not more salt.
- Taste bitter vegetables only once salted, before you start correcting their bitterness with sugar or cream.
If it goes wrong
Dilute an over-salted soup or sauce with unsalted stock, water, cream or milk and bring it back to the right consistency with a short simmer; stretch an over-salted goulash or braised vegetables with another batch of unsalted ingredients. A potato simmered in the pot will not reduce the saltiness, it only soaks up a little liquid. When diluting isn't possible, serve the dish with an unsalted side such as rice or bread.
Allergens
Contains: Gluten
May contain: Egg
Derived from ingredients – check the package label.
Nutrition, allergens and calories are for the default choice – the first alternative of every slot.
Nutrition per menu portion
Per serving
- Protein11.2 g12%
- Fat6.6 g17%
- Total carbohydrate (by difference)62.8 g71%
Share of energy from protein, fat and carbohydrate (4 / 9 / 4 kcal per g), not share by weight.
- Energy
- 354.5 kcal
- Protein
- 11.2 g
- Fat
- 6.6 g
- Total carbohydrate (by difference)
- 62.8 g
- Total dietary fibre (USDA)
- 4.9 g
- Saturated fatty acids
- 0.97 g
- Sodium
- 605.7 mg
- Salt (sodium × 2.5)
- 1.5 g
Per 100 g
- Energy
- 121.2 kcal
- Protein
- 3.8 g
- Fat
- 2.3 g
- Total carbohydrate (by difference)
- 21.5 g
- Total dietary fibre (USDA)
- 1.7 g
- Saturated fatty acids
- 0.33 g
- Sodium
- 207.1 mg
- Salt (sodium × 2.5)
- 0.52 g
A dash means the value is unknown, not zero. Salt is calculated from sodium (g salt = mg sodium × 2.5 / 1000) and includes sodium from all ingredients.
Calculation limitations
- Nutrition is a calculated estimate, not a laboratory measurement.
- Some ingredient quantities use documented estimates or household-measure assumptions.
- Fibre, saturated fat and sodium of cooked ingredients are estimated from the consumed ingredient amounts; for drained ingredients, sodium is included only where the retained amount is an explicit editorial estimate.
- Some process effects could not be resolved in this calculation.
- Menu nutrition is the sum of its component recipes, each scaled to one menu portion.