Menu · 3 components
Beef steak with béarnaise sauce
Pan-seared beef steak with béarnaise sauce and pommes Anna; maître d’hôtel butter is the further sauce, chips or buttered green beans the further sides.
Menu portion137 min874.1 kcal per menu portion
- Good for lunch
- Good for dinner
1Main course
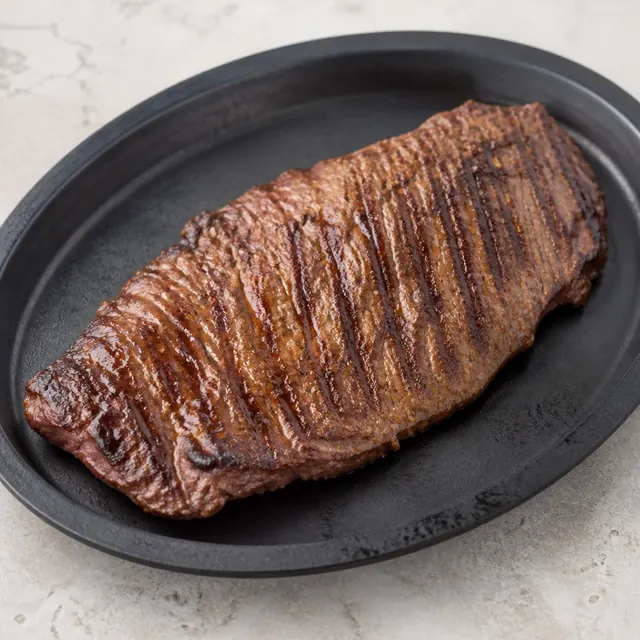
Argentine beef steak
343 kcal per menu portion · 1 × recipe portion per menu portion
- Lactose free
- Gluten free
Contains none of the 14 main allergens.
Quantities for the whole recipe (4 servings).
Ingredients
- 800 gBeef, flank, steak, separable lean only, trimmed to 0" fat, choice, raw
- 1.5 15 ml tablespoonOil, olive, salad or cooking
- 4 gSalt, table
Method
- Pat steak dry and salt it.
TipSalting meat ahead (dry brining)Salt is patient: first it draws the juices out of the meat, and given time it puts them back.Why and howShow less
Why
Salt on the surface first draws juices out, dissolves in them, and the resulting brine is absorbed back in as the meat rests; that is why meat is wet shortly after salting and dry again after a longer wait. Inside the meat, salt loosens some of the muscle proteins, mainly myosin, so they contract less during cooking, the fibres squeeze out less juice and the meat is seasoned below the surface, not just on the outside. Kitchen tests allow about 1 hour for steaks and chops, 6 to 24 hours in the fridge for roasts and whole chicken, and 24 to 48 hours for turkey. Meat salted only shortly before searing still has drawn-out juices on its surface, which must evaporate first, so it steams grey instead of forming a crust; salt either just before it goes into the pan, or well in advance. For grilling, the German BfR advises salting only at the end; if you want to follow it, salt grilled meat only after grilling.
How to do it
- Salt steaks and chops about 1 hour ahead, roasts and whole chicken 6 to 24 hours, turkey 24 to 48 hours ahead.
- When salting for longer, keep the meat on the bottom shelf of the fridge, on a rack over a plate and only loosely covered.
- Salt evenly on all sides, using the same amount you would otherwise use, not more.
- Pat the meat dry with paper towels before cooking and don't salt it again.
- If there's no time to salt ahead, salt just before the meat goes into the hot pan, not a little while before.
- Leave poultry in the fridge unwrapped, only loosely covered so the cover doesn't touch the skin: the skin dries out and crisps better in the oven.
If it goes wrong
Oversalted meat can only partly be saved: slice it thinly and serve it with an unsalted sauce and side. A grey surface without a crust means the meat was wet on the surface – next time pat it dry thoroughly before searing and let the pan heat up well.
- Heat oil to 200 °C. Sear steak 4 minutes on the first side and 4 minutes after turning, until the centre reaches at least 63 °C.
TipInternal temperature of meatThe colour of meat likes to lie; the thermometer is the only witness you can trust.Why and howShow less
Why
Safety depends on the temperature in the thickest part of the piece, not on the recipe's timing or the colour: minced meat can turn brown before it reaches a safe temperature, while lean meat may stay pink even when cooked through. US authorities (USDA, CDC) give minimum core temperatures of 74 °C for all poultry, 71 °C for minced meat and 63 °C for whole cuts of beef, pork, veal and lamb, which should then rest for at least 3 minutes. European authorities work with a holding time: the UK FSA and the German BfR give 70 °C in the core for 2 minutes, and the FSA advises cooking poultry, pork and minced meat right through, with no pink. According to the FSA, a whole cut of beef or lamb may be served pink because the bacteria sit on the surface, which gets seared; culinary levels such as rare (around 52–55 °C) or medium rare (around 55–60 °C) lie below the US threshold, though, so they are a matter of personal choice, and for pregnant women, young children, older people and anyone with weakened immunity it is safer to cook the meat through.
How to do it
- Measure with a probe thermometer in the thickest part, away from bone and fat; push it into a thin patty from the side.
- Cook poultry until the core reads at least 74 °C, including the thighs and stuffing.
- Cook minced meat, sausages and stuffed rolls to at least 71 °C, with no pink inside.
- Take whole cuts of beef and lamb off at 63 °C at the earliest and rest them for at least 3 minutes; cook pork through to 70 °C, as in European practice.
- If you choose a pink steak, always sear it well on all sides, and serve it cooked through to vulnerable groups.
If it goes wrong
If the thermometer reads too low, put the meat back in the oven or pan and measure again after a few minutes; finish cut slices in the pan. Overcooked, dry meat won't turn juicy again – slice it thinly and serve it with a sauce; next time take it off a few degrees earlier and allow for carryover cooking.
- Rest 5 minutes and cut into four portions; sauce and side are not part of this recipe.
2Sauce
Béarnaise sauce traditional
223 kcal per menu portion · 1 × recipe portion per menu portion
- Low in lactose
- Gluten free
Contains: Egg, Milk, Sulphites
Quantities for the whole recipe (6 servings).
or:
- Maître d'hôtel butter · 144 kcal per menu portion
Ingredients
- 65 mlAlcoholic beverage, wine, table, white
- 65 mlTarragon vinegar
- 13 gShallots, raw not counted – removed
- 17 gFresh tarragon not counted – removed
- 7 gFresh chervil not counted – removed
- 3.3 gSpices, pepper, black not counted – removed
- 0.4 gSalt, table
- 34 gEgg, yolk, raw, fresh
- 165 gButter, without salt
- 0.1 gSpices, pepper, red or cayenne
- 1 gFresh tarragon
- 0.5 gFresh chervil
Method
- Melt the butter and keep it warm (cold butter in pieces can also be used). Put 65 ml of white wine, 65 ml of tarragon vinegar, the chopped shallot, the coarsely chopped tarragon sprigs, the chervil, the crushed pepper and a pinch of salt into a small saucepan. Reduce by two thirds until about 3 tbsp of liquid remain.
TipReducing a sauceReduction boils off the water but keeps the salt: a sauce that was just right can easily end up as brine.Why and howShow less
Why
When you reduce a sauce, simmering it uncovered, water evaporates while flavour compounds, sugars, gelatin from meat and bones and salt stay in the pan, so they become concentrated and the sauce thickens. If you salt it at the start and then reduce it by half, it will be roughly twice as salty – which is why seasoning is adjusted at the end. The brown bits stuck to the bottom of the pan or roasting tin after searing or roasting (the fond) are among the tastiest parts of a sauce: poured over with stock, wine or water and scraped up, they dissolve into the sauce – this is called deglazing. A gentle simmer is enough; at a hard boil the sauce easily scorches at the edges and on the bottom, and if it contains a lot of sugar or gelatin it reduces into a sticky mass.
How to do it
- Cook uncovered in a wider pan so the water evaporates faster.
- Salt only at the end, once the sauce has the thickness you want.
- Pour hot stock, wine or water over the fond and scrape it off the bottom with a wooden spoon; leave out black, burnt bits, they would make the sauce bitter.
- Keep only a gentle simmer and stir now and then, especially at the bottom and the edges.
- Test the thickness on a spoon: the sauce should coat it thinly; bear in mind it will thicken further as it cools.
If it goes wrong
An oversalted sauce can only be saved by diluting it: add unsalted stock, water or cream and bring the thickness back with a short simmer. Thin a sauce that is too thick or sticky with a little hot water. Pour a scorched sauce into a clean pan at once without scraping the bottom; if it already tastes burnt, it can't be saved.
- Let the reduction cool for a few minutes, add the yolks and gradually work in the butter over gentle heat (or in a water bath), whisking lightly. Only the gradually cooking yolks bind the sauce, so gentle heat is essential; do not let the yolks get hotter than about 65 °C.
TipHollandaise and mounting with butterHollandaise lives in a narrow temperature window: let it cool and it sets, a few degrees too hot and it's scrambled eggs.Why and howShow less
Why
Hollandaise is a warm emulsion: droplets of melted butterfat dispersed in the water from the yolks, the butter and the lemon juice or reduction, coated with lecithin and proteins from the yolk. The yolks thicken the sauce once they reach roughly 65 °C, but above about 70 °C their proteins curdle into grains and the emulsion falls apart – which is why it is whisked over a water bath or on very gentle heat. If the sauce cools down instead, the butter firms up and the sauce thickens until it sets, and if too much butter meets too little water, the droplets merge and the sauce splits much like an overloaded mayonnaise. Mounting a sauce with butter works on the same principle without the yolk: cold butter whisked piece by piece into a hot but not boiling reduction disperses into tiny droplets that the butter's own proteins and emulsifiers hold in place – until you overheat the sauce or bring it to the boil.
How to do it
- Whisk the yolks with a little water, lemon juice or reduction over a water bath that is barely simmering and doesn't touch the bowl.
- Whisk until the mixture thickens and the whisk leaves a trail; lift the bowl off the steam now and then.
- Add warm, not hot, melted butter drop by drop at first, then in a thin stream.
- Keep the finished sauce in a bowl over warm water off the hob and serve it as soon as you can.
- To mount a sauce, take the reduction off the heat and whisk in cold butter cube by cube, adding the next once the last has melted; then don't let it boil.
- For children, pregnant women, older people and the immunocompromised, use pasteurised yolks: a sauce kept below 70 °C won't reliably kill salmonella.
If it goes wrong
If the sauce starts to turn grainy or greasy, take it off the heat at once and whisk in a spoonful of cold water. If it has split completely, put a fresh yolk with a spoonful of warm water in a clean bowl and whisk the broken sauce into it a teaspoon at a time. Warm a sauce that has cooled and set over a water bath, whisking constantly. Badly curdled lumps of yolk can't be fixed – strain the sauce or start again.
- Pass the sauce through a cloth or fine sieve (the shallot, herbs and pepper from the reduction stay behind). Season with a pinch of cayenne and salt and stir in the chopped tarragon and chervil.
- Serve lukewarm with grilled beef, veal or lamb; served hot it easily splits. If it starts to split, add a few drops of cold water and whisk vigorously.
Alternative: Maître d'hôtel butter
Ingredients
- 100 gButter, without salt
- 2.5 gParsley, fresh
- 3.2 gSalt, table
- 0.4 gSpices, pepper, black
- 1 5 ml teaspoonLemon juice, raw
Method
- Let the butter soften at room temperature, knead it and beat it with a wooden spoon into a smooth cream.
- Mix in the finely chopped parsley, salt, pepper and 1 tsp of lemon juice.
- Serve the butter soft, or roll it into a log in baking paper, chill it and slice it into rounds. Place them on hot grilled meat or fish just before serving.
3Side dish
Potato cake (pommes Anna) traditional
308 kcal per menu portion · 1 × recipe portion per menu portion
- Vegetarian
- Low in lactose
- Gluten free
Contains: Milk
Quantities for the whole recipe (6 servings).
or:
- Pub chips · 336 kcal per menu portion
- Buttered green beans (haricots verts au beurre) · 230 kcal per menu portion
Ingredients
- 1,000 gPotatoes, flesh and skin, raw
- 150 gButter, without salt
- 8 gSalt, table
- 1 gSpices, pepper, black
Method
- Heat the oven to 220 °C. Peel the potatoes, trim them into cylinders about 4 cm across and cut them into rounds 2 mm thick. Rinse the rounds in cold water and dry them thoroughly in a cloth. Melt 150 g of butter.
- Brush a heavy ovenproof pan 22–24 cm across with butter. Arrange the rounds on the bottom in overlapping circles, reversing the direction of each circle. Season the layer with salt and pepper and brush it with melted butter.
- Build up another 4–5 layers in the same way, seasoning each and brushing it with butter; pour the rest of the butter over the top. Cover the pan with a lid or foil.
- Bake covered at 220 °C for 30 minutes. If the bottom is already golden brown but the top is pale, turn the cake out onto a lid, slide it back into the pan and bake uncovered for another 10 minutes so that it colours evenly. The potatoes must be tender inside; a knife should slide in without resistance.
- Turn the cake out onto a lid, let the excess butter drain off, then slide it onto a warmed plate. Cut into 6 wedges and serve at once.
Alternative: Pub chips
Ingredients
- 800 gPotatoes, flesh and skin, raw
- 90 mlOil, olive, salad or cooking
- 3 gSalt, table
Method
- Prepare 800 g undamaged skin-on potatoes, scrub them and cut into chips about 12 mm wide. Rinse them and soak in cold water for 30 minutes, then drain, rinse and dry them thoroughly.
TipFrench fries and double fryingFries are fried twice: first slowly so the inside softens, then briefly so they turn golden – golden, not brown.Why and howShow less
Why
During the first fry at a lower temperature, around 150–160 °C, the starch inside the fry gelatinises and softens and the surface starts to dry out while the fry stays pale; as it rests, more steam escapes and the surface firms up. In the second, short fry this dried layer quickly becomes a crisp golden crust, whereas with a single fry a thicker chip either burns outside while staying raw inside, or ends up soft and greasy. Browning also produces acrylamide, which forms from sugars and the amino acid asparagine above about 120 °C and increases quickly as the colour darkens. EU Regulation 2017/2158 therefore requires food businesses to fry chips at no more than 175 °C and recommends soaking or blanching the potatoes beforehand, because the water washes some of the sugars off the surface. The UK FSA advises cooking starchy foods at home, whether fried, baked or toasted, only to a golden yellow, so fries cooked until brown are not only bitter but also carry needless acrylamide.
How to do it
- Cut the potatoes into fries of even thickness, about 10–12 mm, rinse them and soak them in cold water for 30 minutes to 2 hours.
- Before frying, drain and rinse them and dry them thoroughly in a tea towel; wet fries pull down the oil temperature and the water makes the oil spit.
- Fry them the first time in small batches at 150–160 °C for about 5–8 minutes, until soft but still pale (for safety see the Deep-frying in oil card).
- Drain the fries on a rack and let them rest for at least 10 minutes; meanwhile heat the oil for the second fry.
- Fry them the second time at 170–175 °C, no hotter, for just 2–4 minutes, and take them out as soon as they are golden yellow, not brown.
- Salt them in a bowl after frying and serve at once; fries from the oven or an air fryer should also be cooked only until golden.
If it goes wrong
Soft, greasy fries were fried in oil that was too cool or in too large a batch; let the oil heat up again and briefly refry them in smaller batches. Fries golden outside and raw inside were fried only once or in oil that was too hot; finish them for a few minutes in the oven. Dark brown, bitter fries cannot be fixed; discard the darkest ones and fry for a shorter time next time. Put fries that have gone limp back into hot oil or a hot oven for 1–2 minutes.
- Heat about 1 l oil in a deep fryer to 160 °C. Fry potatoes in batches for eight minutes until soft but still pale, then rest them on a rack for ten minutes.
TipDeep-frying in oilIn properly hot oil food sizzles cheerfully and crunches; in lukewarm oil it quietly soaks it up like a sponge.Why and howShow less
Why
In oil heated to about 160–180 °C, the water at the surface of the food turns rapidly into steam that rushes outwards, holding back the fat while the surface dries and sets into a golden crust; in lukewarm oil the steam fades before the crust has set, and the food takes up more fat. Every fat has a smoke point, the temperature at which it begins to give off a bluish smoke: refined oils and frying fats have a high one, unrefined oils and butter a low one, and it drops with every further use because the fat breaks down. How long a fat lasts in the fryer depends more on its resistance to oxidation than on its smoke point; worn-out oil gives itself away by a dark, cloudy colour, an acrid smell, smoke and thickening. For chips and other potato products it is recommended not to exceed 175 °C and to fry only until golden, not brown, because acrylamide rises quickly with higher temperature and darker colour. Water in hot oil boils instantly and spatters the oil, which is why burning fat must never be put out with water.
How to do it
- Fry in a deep fryer or a deep pot; fill the oil only so high that there is room left for it to bubble up once the food goes in, and in a fryer never above the MAX mark.
- Watch the temperature with a thermometer or thermostat; dry the food first and lower it in in small batches, carefully and away from you.
- Never leave frying unattended; as soon as the oil starts to smoke, turn off the heat.
- Cover a burning pot with a lid or baking sheet, turn off the heat and leave it covered until it has cooled; a fire blanket or a class F extinguisher is the backup.
- Never put out burning oil with water or carry the pot anywhere; if the fire doesn't go out at once, leave, close the door behind you and call 112 or your local emergency number (150 in Czechia).
- Strain used oil, store it covered in a cool, dark place and throw it out once it darkens, foams, smells off or smokes at normal frying temperature.
If it goes wrong
Food that has soaked up oil can't be de-greased; let the oil reheat and fry the next batch smaller. If food is burnt outside and raw inside, fry it at a lower temperature next time; thicker pieces can be finished in the oven. If the oil starts to smoke, take it off the heat and let it cool; don't use oil that has smoked heavily for frying again.
TipFrench fries and double fryingFries are fried twice: first slowly so the inside softens, then briefly so they turn golden – golden, not brown.Why and howShow less
Why
During the first fry at a lower temperature, around 150–160 °C, the starch inside the fry gelatinises and softens and the surface starts to dry out while the fry stays pale; as it rests, more steam escapes and the surface firms up. In the second, short fry this dried layer quickly becomes a crisp golden crust, whereas with a single fry a thicker chip either burns outside while staying raw inside, or ends up soft and greasy. Browning also produces acrylamide, which forms from sugars and the amino acid asparagine above about 120 °C and increases quickly as the colour darkens. EU Regulation 2017/2158 therefore requires food businesses to fry chips at no more than 175 °C and recommends soaking or blanching the potatoes beforehand, because the water washes some of the sugars off the surface. The UK FSA advises cooking starchy foods at home, whether fried, baked or toasted, only to a golden yellow, so fries cooked until brown are not only bitter but also carry needless acrylamide.
How to do it
- Cut the potatoes into fries of even thickness, about 10–12 mm, rinse them and soak them in cold water for 30 minutes to 2 hours.
- Before frying, drain and rinse them and dry them thoroughly in a tea towel; wet fries pull down the oil temperature and the water makes the oil spit.
- Fry them the first time in small batches at 150–160 °C for about 5–8 minutes, until soft but still pale (for safety see the Deep-frying in oil card).
- Drain the fries on a rack and let them rest for at least 10 minutes; meanwhile heat the oil for the second fry.
- Fry them the second time at 170–175 °C, no hotter, for just 2–4 minutes, and take them out as soon as they are golden yellow, not brown.
- Salt them in a bowl after frying and serve at once; fries from the oven or an air fryer should also be cooked only until golden.
If it goes wrong
Soft, greasy fries were fried in oil that was too cool or in too large a batch; let the oil heat up again and briefly refry them in smaller batches. Fries golden outside and raw inside were fried only once or in oil that was too hot; finish them for a few minutes in the oven. Dark brown, bitter fries cannot be fixed; discard the darkest ones and fry for a shorter time next time. Put fries that have gone limp back into hot oil or a hot oven for 1–2 minutes.
- Heat oil to 175 °C and fry chips for three to four minutes until golden, not brown. Drain, transfer to a bowl and toss with 3 g salt. Nutrition counts 90 ml oil under C-FRY.
TipFrench fries and double fryingFries are fried twice: first slowly so the inside softens, then briefly so they turn golden – golden, not brown.Why and howShow less
Why
During the first fry at a lower temperature, around 150–160 °C, the starch inside the fry gelatinises and softens and the surface starts to dry out while the fry stays pale; as it rests, more steam escapes and the surface firms up. In the second, short fry this dried layer quickly becomes a crisp golden crust, whereas with a single fry a thicker chip either burns outside while staying raw inside, or ends up soft and greasy. Browning also produces acrylamide, which forms from sugars and the amino acid asparagine above about 120 °C and increases quickly as the colour darkens. EU Regulation 2017/2158 therefore requires food businesses to fry chips at no more than 175 °C and recommends soaking or blanching the potatoes beforehand, because the water washes some of the sugars off the surface. The UK FSA advises cooking starchy foods at home, whether fried, baked or toasted, only to a golden yellow, so fries cooked until brown are not only bitter but also carry needless acrylamide.
How to do it
- Cut the potatoes into fries of even thickness, about 10–12 mm, rinse them and soak them in cold water for 30 minutes to 2 hours.
- Before frying, drain and rinse them and dry them thoroughly in a tea towel; wet fries pull down the oil temperature and the water makes the oil spit.
- Fry them the first time in small batches at 150–160 °C for about 5–8 minutes, until soft but still pale (for safety see the Deep-frying in oil card).
- Drain the fries on a rack and let them rest for at least 10 minutes; meanwhile heat the oil for the second fry.
- Fry them the second time at 170–175 °C, no hotter, for just 2–4 minutes, and take them out as soon as they are golden yellow, not brown.
- Salt them in a bowl after frying and serve at once; fries from the oven or an air fryer should also be cooked only until golden.
If it goes wrong
Soft, greasy fries were fried in oil that was too cool or in too large a batch; let the oil heat up again and briefly refry them in smaller batches. Fries golden outside and raw inside were fried only once or in oil that was too hot; finish them for a few minutes in the oven. Dark brown, bitter fries cannot be fixed; discard the darkest ones and fry for a shorter time next time. Put fries that have gone limp back into hot oil or a hot oven for 1–2 minutes.
Alternative: Buttered green beans (haricots verts au beurre)
3Side dish
Buttered green beans (haricots verts au beurre)
Quantities for the whole recipe (4 servings).
Ingredients
- 500 gGreen beans, raw
- 3 lBeverages, water, tap, drinking not counted – removed
- 3 gSalt, table editorial addition
- 2 gSalt, table
- 0.4 gSpices, pepper, black
- 100 gButter, without salt
Method
- Top and tail the beans and remove the string if they have one. Bring 3 litres of water with 30 g of salt to the boil in a wide pot.
- Add the beans and boil them hard, uncovered, for 6–8 minutes until they are slightly firm to the bite but no longer hard. Drain them and do not refresh them in cold water.
TipGreen vegetables and chlorophyllBroccoli only turns brilliant green once: at the start of cooking. After that it just waits to be rescued before it goes grey.Why and howShow less
Why
The green colour of vegetables comes from chlorophyll, which has a magnesium atom at its centre; in acidic conditions hydrogen pushes it out and the bright green pigment turns olive brown. The vegetable releases acid itself as heat damages its cells, so the longer it cooks, the more olive it gets; lemon juice or vinegar added to the water has the same effect. In tests a lid made no difference to the colour; what matters most is cooking time. Baking soda makes the water alkaline and keeps the colour, but it quickly softens vegetables to mush and destroys some vitamins, mainly vitamin C and thiamin, so it isn't worth it. Blanching means cooking briefly in plenty of boiling water until the vegetables turn bright green and are tender but firm, then plunging them straight into ice water to stop the cooking.
How to do it
- Cut the vegetables into evenly sized pieces and drop them into a large pot of rapidly boiling water.
- Cook for just a few minutes, until bright green and tender but firm; taste as you go.
- Drain them at once and plunge them into ice water; once cool, drain and pat dry.
- Add lemon juice, vinegar and sharp dressings only just before serving.
- Don't add baking soda to the water and don't worry about the lid; watch the time above all.
If it goes wrong
Olive colour can't be reversed; blend overcooked vegetables into a soup or purée where the colour matters less. In dishes where greens braise for a long time in a sauce, such as saag or Greek green beans, an olive colour is normal and belongs to them. Next time cook the vegetables for less time and cool them straight away.
- Return the beans to the dry pot and toss them over the heat for a minute or two until the moisture has evaporated. Season with 2 g of salt and the pepper.
- Add 100 g of very fresh butter cut into small pieces and toss the beans with it away from fierce heat until the butter has melted and coats them. Serve at once.
Allergens
Contains: Egg, Milk, Sulphites
Derived from ingredients – check the package label.
Nutrition, allergens and calories are for the default choice – the first alternative of every slot.
Nutrition per menu portion
Per serving
- Protein48.3 g22%
- Fat62 g64%
- Total carbohydrate (by difference)29.9 g14%
Share of energy from protein, fat and carbohydrate (4 / 9 / 4 kcal per g), not share by weight.
- Energy
- 874.1 kcal
- Protein
- 48.3 g
- Fat
- 62 g
- Total carbohydrate (by difference)
- 29.9 g
- Total dietary fibre (USDA)
- 3.6 g
- Saturated fatty acids
- 33 g
- Sodium
- 1,064.4 mg
- Salt (sodium × 2.5)
- 2.7 g
Per 100 g
- Energy
- 247.4 kcal
- Protein
- 13.7 g
- Fat
- 17.5 g
- Total carbohydrate (by difference)
- 8.5 g
- Total dietary fibre (USDA)
- 1 g
- Saturated fatty acids
- 9.3 g
- Sodium
- 301.2 mg
- Salt (sodium × 2.5)
- 0.75 g
A dash means the value is unknown, not zero. Salt is calculated from sodium (g salt = mg sodium × 2.5 / 1000) and includes sodium from all ingredients.
Calculation limitations
- Nutrition is a calculated estimate, not a laboratory measurement.
- Some ingredient quantities use documented estimates or household-measure assumptions.
- The number of servings is an editorial estimate (midpoint of the source range or based on the dish type and energy).
- Some specific ingredients are represented by the closest generic food with the same culinary function.
- Fibre, saturated fat and sodium of cooked ingredients are estimated from the consumed ingredient amounts; for drained ingredients, sodium is included only where the retained amount is an explicit editorial estimate.
- Alcohol remaining after cooking is estimated from USDA retention factors by cooking method and time; energy excludes the evaporated alcohol.
- Some process effects could not be resolved in this calculation.
- Menu nutrition is the sum of its component recipes, each scaled to one menu portion.